Setting up and Using the Volume Shadow Copy Service
Preface:
VSS (Volume Shadow Service) is a new feature in Windows Server 2003 that allows you to revert a networked file back to a previous version (or just look at it in an older state, if you wish). I use VSS on my web server in case I upload a new version of my website then say "uh oh" because a section isn't done or I wasn't ready for the update yet. It's a very simple service to use, and this will be a 3 part tutorial.
Parts:
· Setting up the Volume Shadow Service
Setting up and Using the Volume Shadow Copy Service
Setting up Shared Folders (Part 1 of 3)
Preface:
Here I will demonstrate how to share a folder, this is a very important part of VSS
Method:
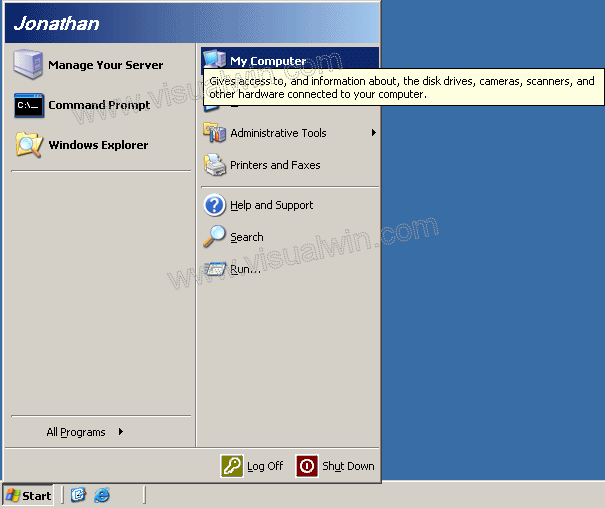
Click Start then "My Computer"
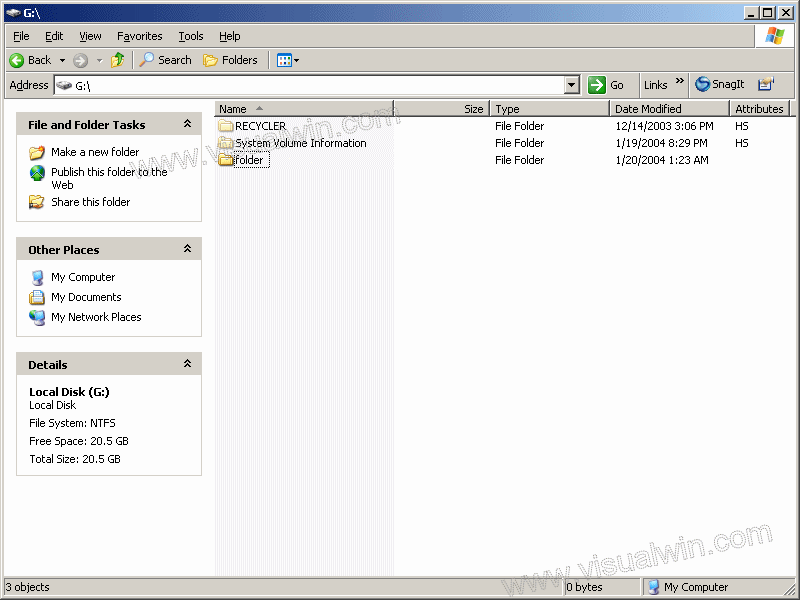
Go to the directory above the one you wish to share. In this example I will share the folder "folder" on G:
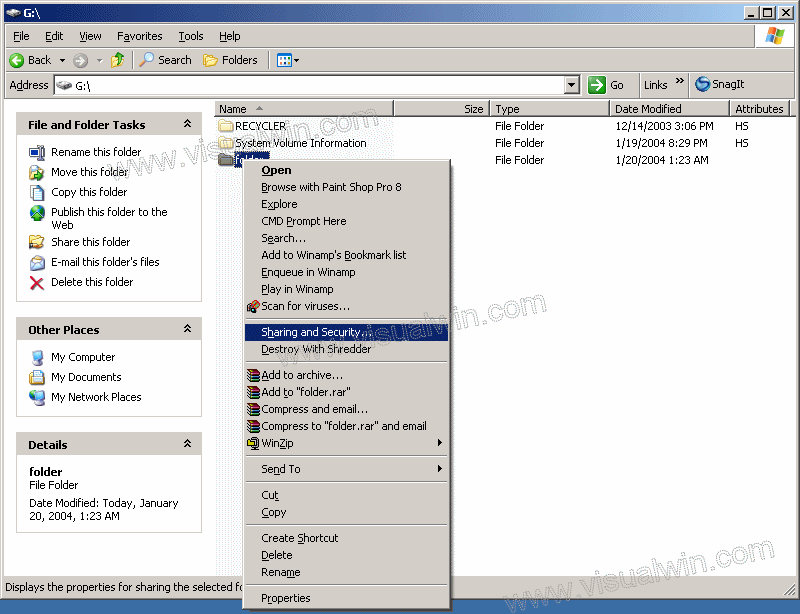
Right click the folder and click "Sharing and Security"
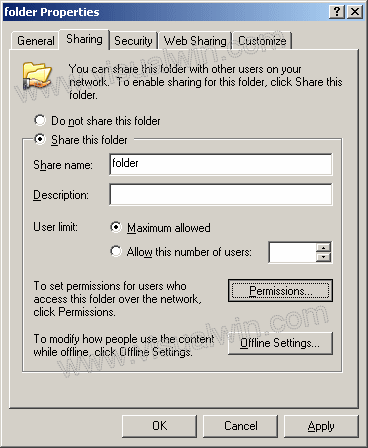
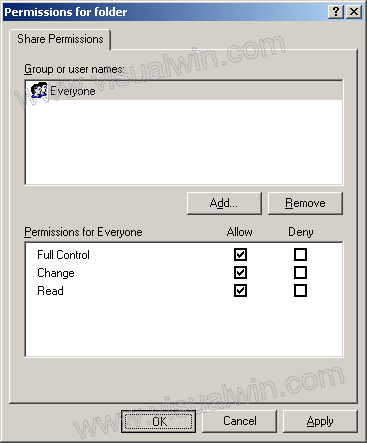
Click "Share this folder" than if you would like, change the name of the desired share. After you do that, click the "Permissions" button
Now you can change who will have access to what on this shared resource, but for the sake of this tutorial, we will give "Everyone" "Full Control". After you select "Allow" for "Full Control", Click "OK" and "OK" on the Share window
Go back to the folder above the shared one in Explorer and you will see a hand under the folder icon which shows that the folder is now shared

And that's it for the sharing section. Continue on to part 2 for setting up VSS.
Setting up and using FrontPage Server Extensions
Setting the default (global) settings in FPSE (Part 2 of 4)
Preface:
This tutorial will overview FPSE and show some of the basic settings. Thanks to Joseph Voldeck for providing most of the content in tutorials 2-4 of this set.
Method:
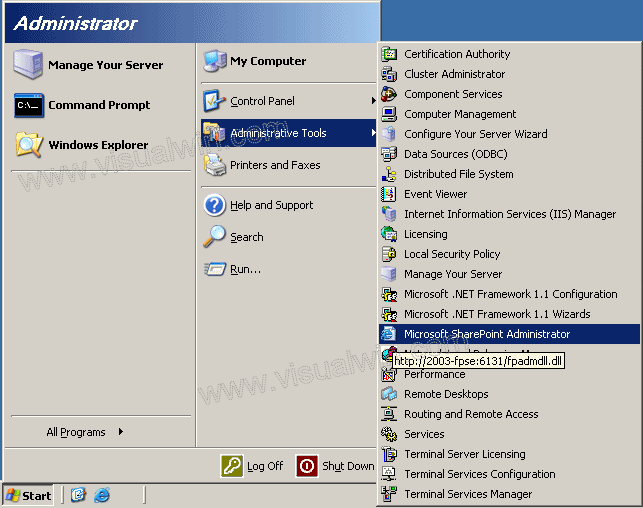
Still have the Administration site open from last tutorial? If not, open it again. Click Start -> Administrative Tools -> Microsoft SharePoint Administrator
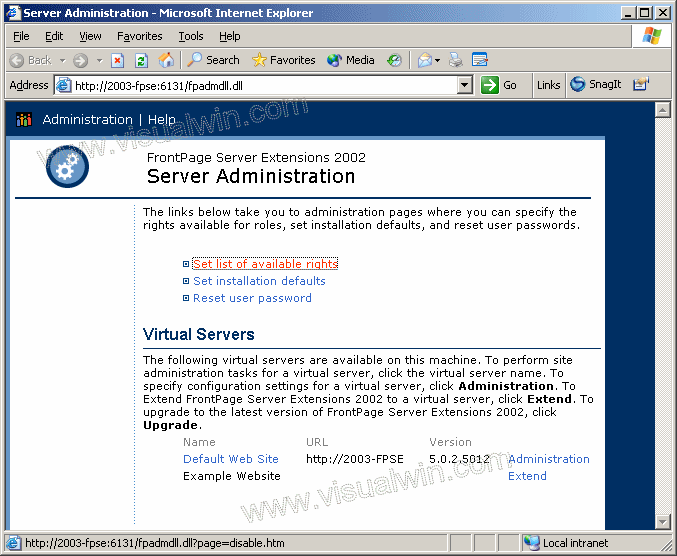
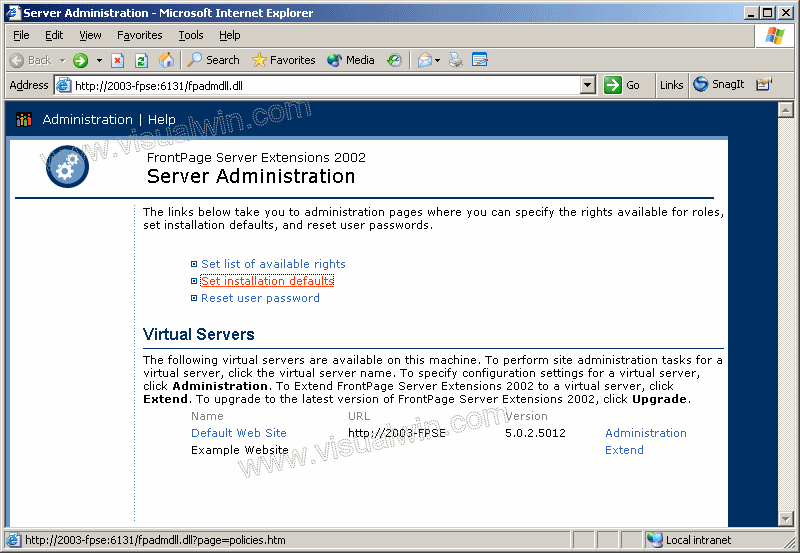
Now let's set the available rights for this server. On the administration site, click "Set list of available rights"
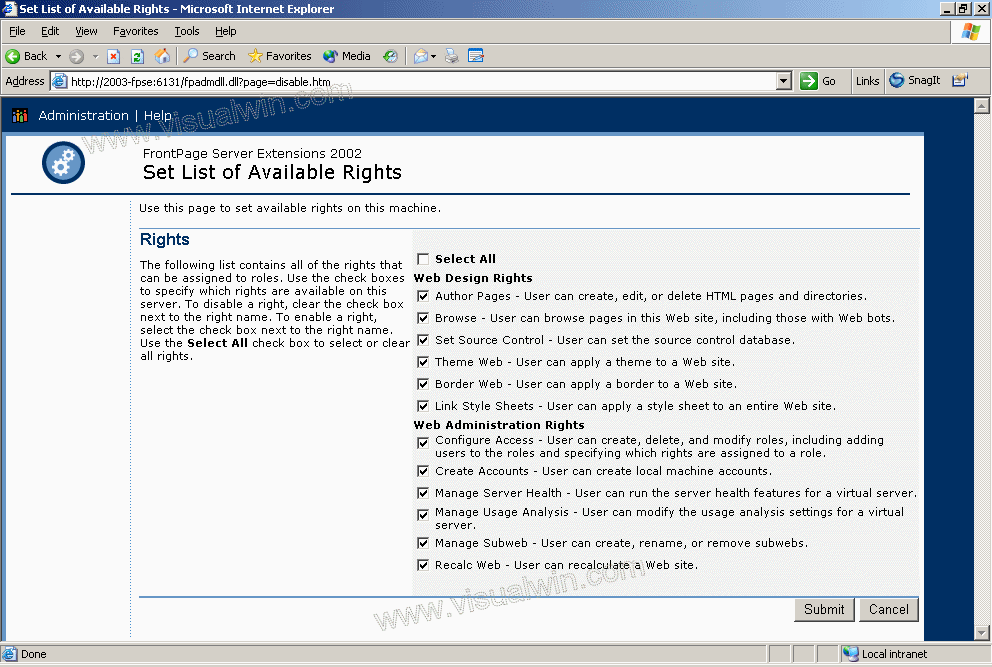
Now we're presented with the list of available rights. This will vary based on what your server does, who accesses it, etc, but for the sake of this tutorial, we will keep the default "Select all" option to give you maximum control
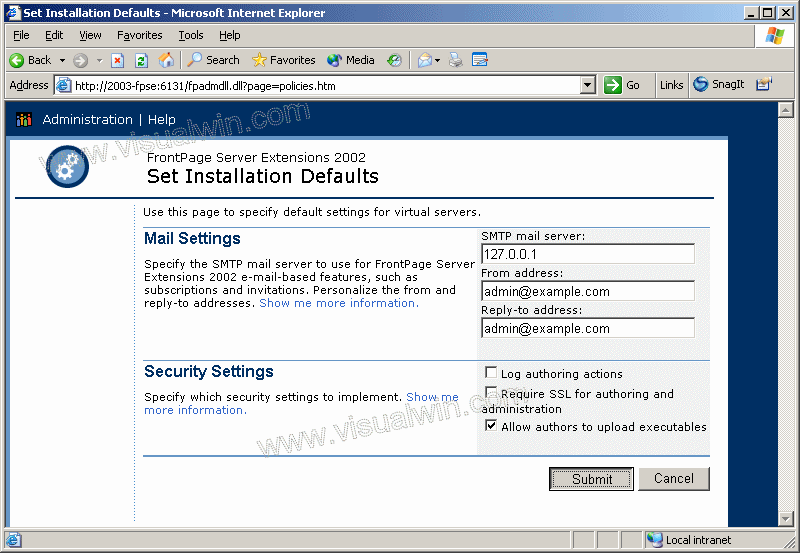
Head back to the main website now and click "Set installation defaults". This will allow us to set things like the default SMTP server for any FP Virtual Server(s) on this machine
Next set your defaults like mail server and from/reply-to addresses. You may also want to "Allow authors to upload executables" because some types of CSS content fails without it. When entering the mail server, be sure you have relay rights! Without this most servers will not be able to send mail outside of their own domain (for example, mail.example.com won't be able to send to an @example2.com). It is for this reason that many people use an internal mail server where they have an open relay, but since it is not accessible by the rest of the world (be sure it's internal or you may have a spam problem) there is nothing major to worry about
And that's all for the default settings!
Continue on to part 3 to extend websites so they also have FPSE on them
Setting up and using FrontPage Server Extensions
Extending a website for use with FPSE (Part 3 of 4)
Preface:
This tutorial will show the extending of a website so that FPSE can be used. A website doesn't have the functionality that FPSE adds without being "extended," even if it is on a server where FPSE has been enabled. Thanks to Joseph Voldeck for providing most of the content in tutorials 2-4 of this set.
Method:
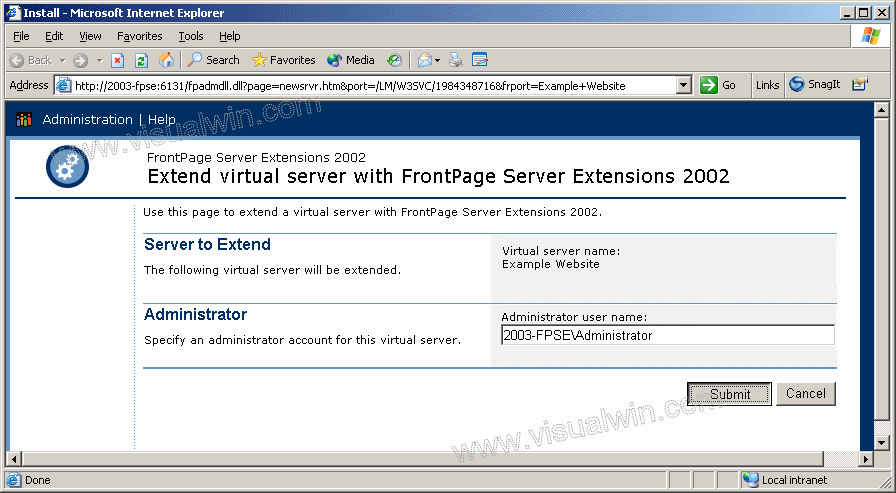
To extend a server, we need to load the "Extend virtual server with FrontPage Server Extensions 2002" webpage. There are two ways to do this, and both will be shown in this tutorial. Immediately below is the method that uses the IIS Manager, and below is the method that uses the Start Menu.
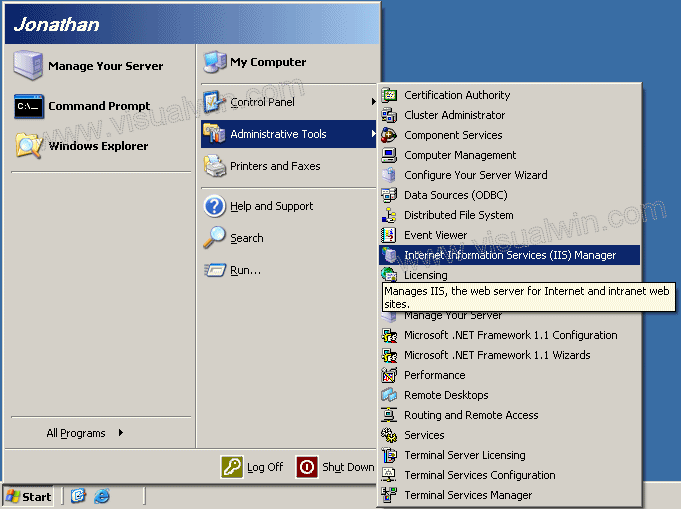
Load IIS from the Administrative tools in the Control Panel by clicking Start -> Administrative Tools -> IIS Manager (or loading the Control Panel, entering the Administrative Tools folder, and double clicking IIS Manager).
Expand the Computer Name and the "Web Sites" folder, then right click on the website you want to extend, mouse over "All tasks" and click "Configure Server Extensions 2002"

Continue on to "Setting it up," below
Click Start -> Administrative Tools -> Microsoft SharePoint Administrator
On the right-hand column next to the website you want to extend, click the "Extend" link
Continue below
Setting it up:
Regardless of the method used to get here, you will now be at this page. Click the "Submit" button after optionally specifying an alternate Administrator for the site
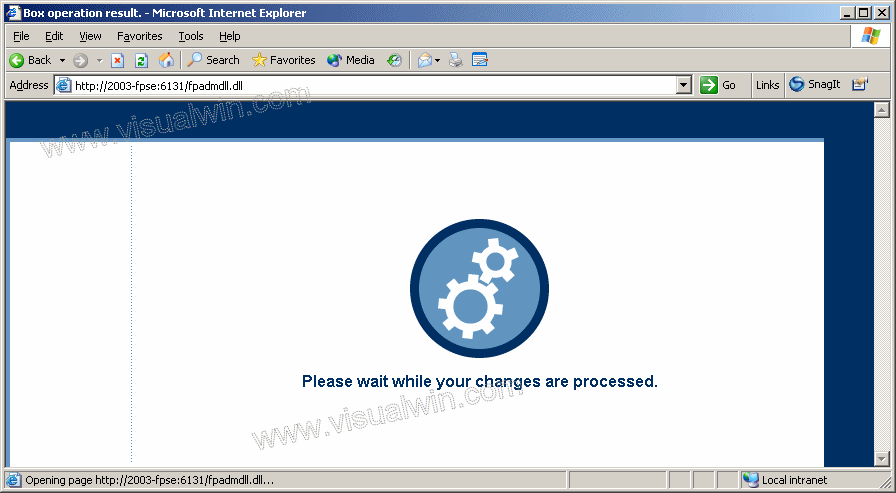
You will see the change being applied
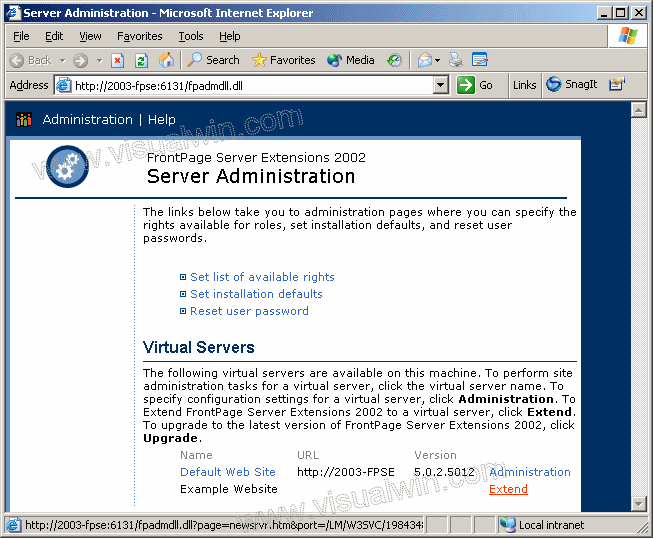
And back to the main site, you will see the FPSE version listed next to the site, which indicates that everything is successful
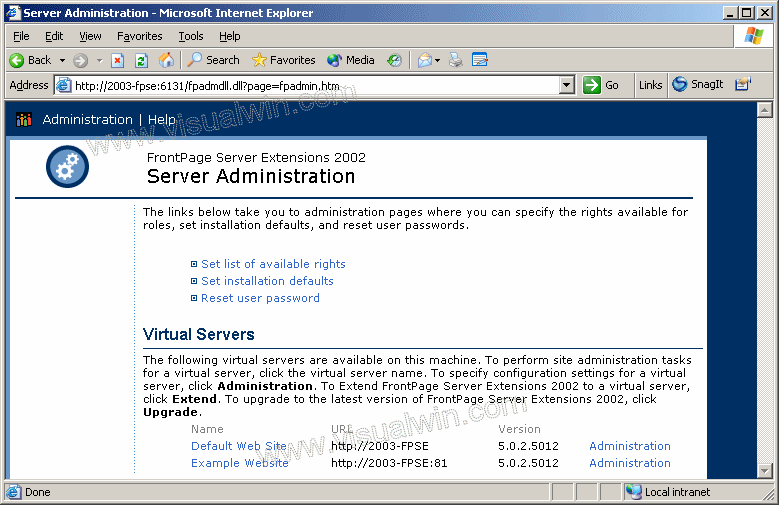
And the site has been extended!
Continue on to part 4 to configure roles and user permissions
Setting up and using FrontPage Server Extensions
Adding an FPSE user to a website (Part 4 of 4)
Preface:
This tutorial will show the adding of a role, and then a user to that role, in FPSE. Specifically, we will create the role "Example Admin," and add the user "Bob" to be the administrator for the "Example Website" we previously created. Thanks to Joseph Voldeck for providing most of the content in tutorials 2-4 of this set.
Method:
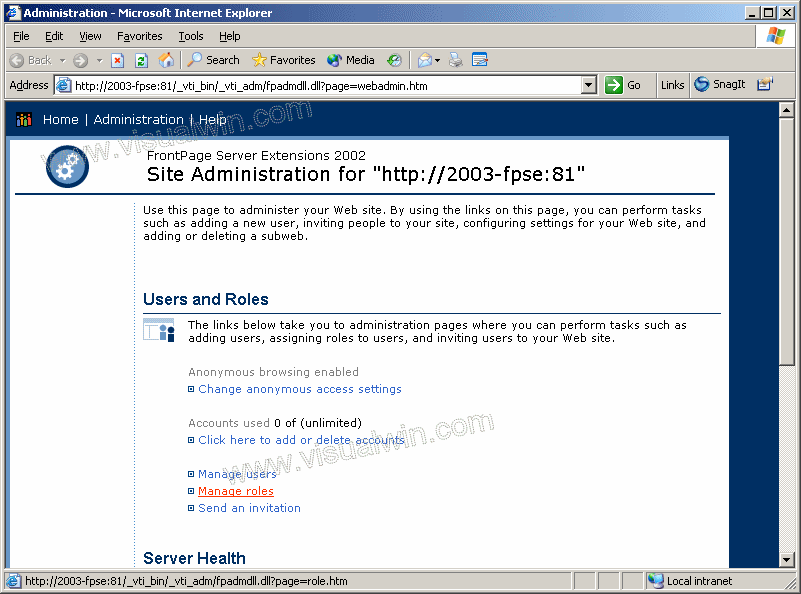
First, load the FPSE Administration site. Click Start -> Administrative Tools -> Microsoft SharePoint Administrator
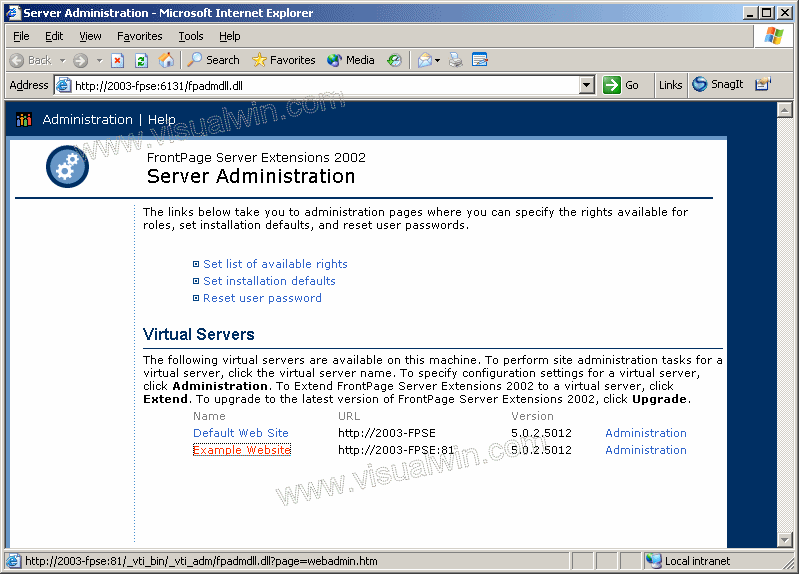
Below is a list of the websites on the server. Click the name will take you to the administration for that site. We will click "Example Website," because that is the website we will be working on. If you click on the "Administration" link to the right of the website, you'll be able to modify settings like the SMTP server for that site
Before adding users to the site, we will need to add a role, which is a short name for "set of permissions." A FrontPage Server Extension role serves the same purpose as a group does on Windows. Clicking "Manage Roles" will take us to the roles websites
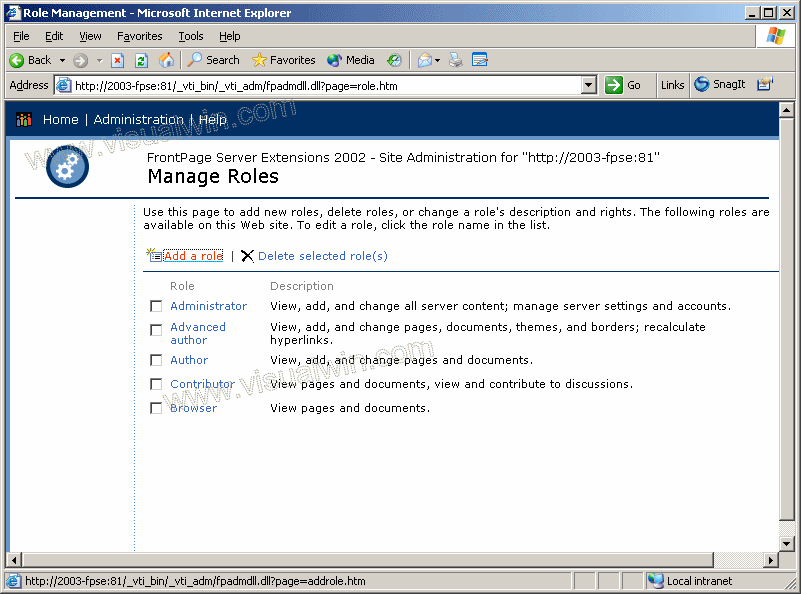
As you can see, FPSE generally comes with a sample set of roles, however there are times when they aren't present. Much like the main administration site, clicking the name of a role will allow you to modify it, but since we will be adding a role, click the "Add a role" link on the top-left
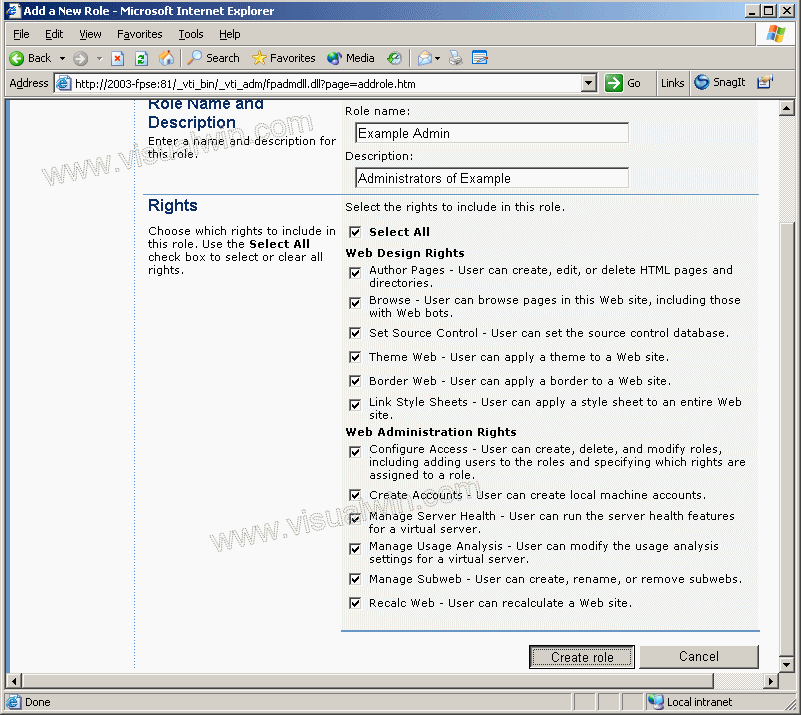
Now we are presented with a group of options we can apply to the role. Because in the beginning it will be the "Example Admin" role, we enter that in the name box, and use the "Select All" checkbox under "Rights," and click "Create role" to make the finalize the new role
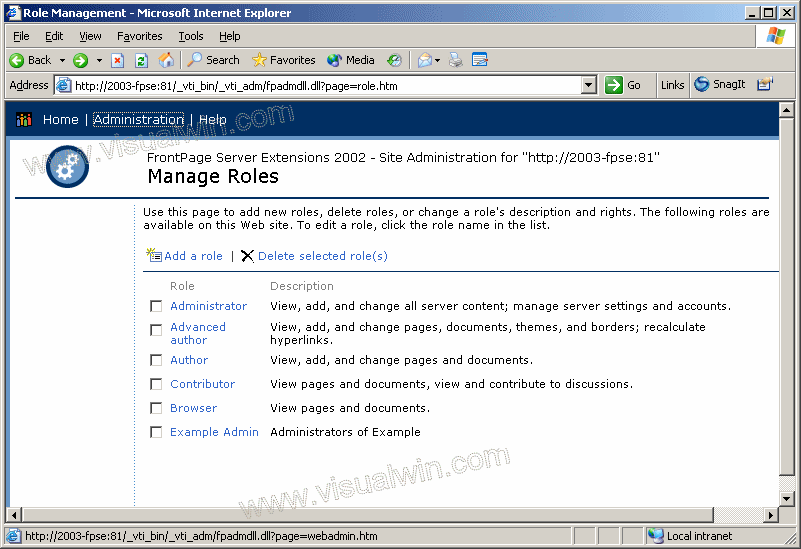
You will be brought back to the "Manage Roles" page. Click "Administration" at the top of the page to be brought back to the main admin page for this website
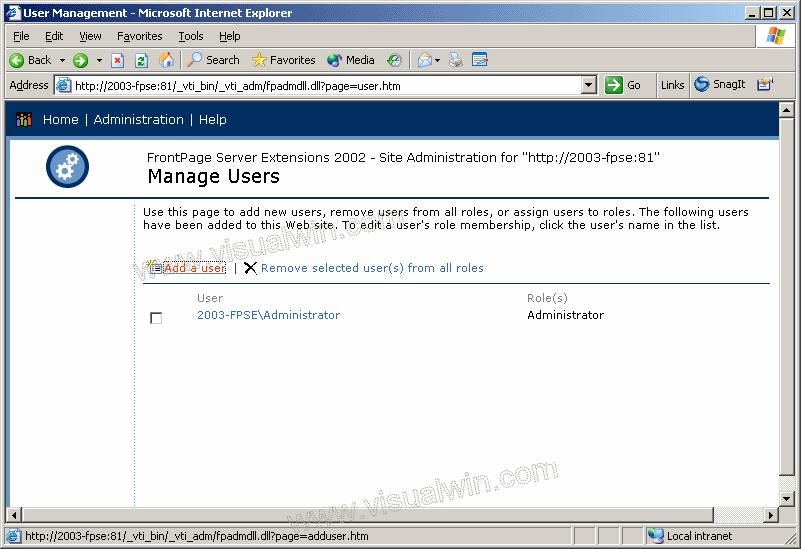
Now we will add a user to the "Example Admin" role. Click "Manage users" to come to the site that allows this

Much like the main admin site and the role managing site, click an existing user in the "Name" column will allow us to modify their role membership. But we will be adding our user at this point by clicking "Add a User"
Here we have the choice of creating a new user, or using an existing Windows user. In this tutorial, we will create a new user, and select the "Example Admin" role under the "User Role" heading, clicking "Add User" will finalize the addition

Below you will see the user has been created and added to the "Example Admin" role

That's all for the FrontPage Server Extensions set of tutorials. Hope you found them informational!
No comments:
Post a Comment